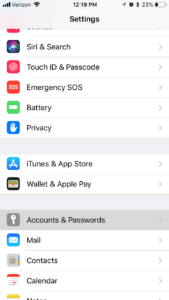
Step 1

Select your ‘Settings‘ application to begin adding Office 365 email accounts to your iOS device.
Step 2
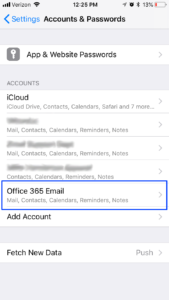
Select ‘Accounts & Passwords‘ from your Settings menu to access your iOS device’s list of email accounts.
Step 3
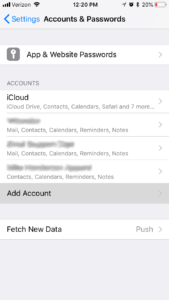
Choose ‘Add Account‘ from your iOS device’s Accounts & Passwords screen to begin adding an Office 365 account.
Step 4
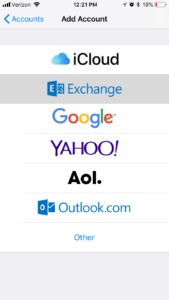
Select ‘Exchange‘ as the mail type. This is used in iOS devices for both Office 365 and exchange mailbox setup.
Step 5
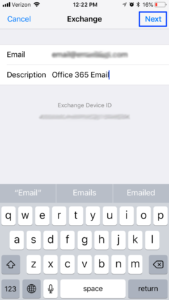
Enter your Office 365 email address and a description for the mail account and click ‘Next‘ in the top right.
Step 6
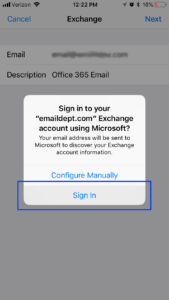
You can configure manually but an Office 365 account should connected automatically when you press ‘Sign In.’
Step 7
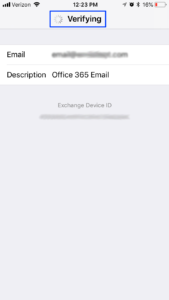
Your iOS device will say ‘Verifying‘ at the top for a moment and when it finds your server will ask for a password.
Step 8
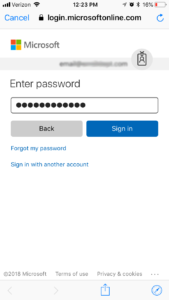
Enter your correct Office 365 account password and click ‘Sign In.’ If you can’t connect, try to sign in on a computer.
Step 9
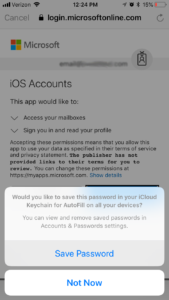
Your iOS device will ask if you want to ‘Save Password.’ This is up to you but you will probably want to do this.
Step 10
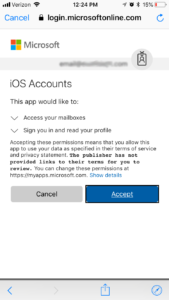
Your iOS device will ask you to ‘Accept‘ that the Office 365 servers will be able to talk to your phone for email.
Step 11
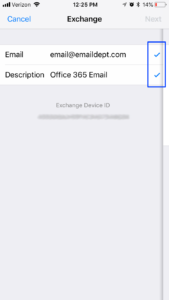
You should flash back to the Exchange account page with your email and account description and get check marks.
Step 12
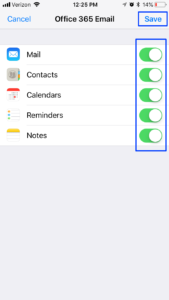
Your Office 365 account will show with a list of what to sync to your iOS device. Select and ‘Save.’
Step 13
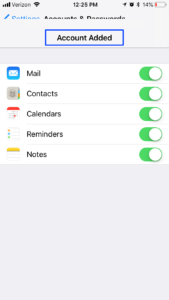
You are looking to see ‘Account Added‘ with the selected options when your Office 365 account sets up.
Step 14
On the Accounts & Passwords menu of your iOS device, you should see your Office 365 account added to the list.